 |  |

Creating a Canvas
The Canvas Coordinate System
The Scrollable Region
Using bind with a Canvas
Canvas Options
Creating Items in a Canvas
Configuring the Canvas Widget
Configuring Items in the Canvas Widget
Tags
Retrieving Bounding Box Coordinates
Translating Coordinates
Moving Items Around
Changing the Display List
Deleting Items
Deleting Tags
Determining Item Type
Setting Keyboard Focus
Rendering the Canvas as PostScript
Scaling the Canvas
Scanning
A Drawing Program Example
The Canvas widget is used mainly for drawing items such as arcs, lines, rectangles, circles, and so on, but you can also place text and other widgets inside a Canvas widget. Here are some examples of how you can use a Canvas widget:
Create a drawing program.
Display a graph based on input from the user.
Create a customized slider.
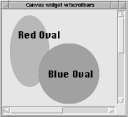
Figure 9-1 shows a Canvas widget.

Each item you create in a Canvas widget is assigned a unique item ID, which is a positive integer. Using an item's ID is a common way of addressing individual Canvas items, but you can devise tag names and use them as well. All Canvas items can have bindings attached to them for easy interaction with the user.
It's easiest to always use the Scrolled method to create a Canvas, unless you know for sure your Canvas is going to be a fixed size that will fit in the window:
$canvas = $mw->Canvas( [ option => values, ... ] )->pack( );
# or...
$canvas = $mw->Scrolled('Canvas', [ option => values, ... ])->pack( );
The first line creates just a Canvas and the second creates a Canvas with Scrollbars. (See Chapter 6, "The Scrollbar Widget" for more information on the Scrolled method.) To create a Canvas widget, use the desired parent widget to invoke the Canvas method and pass any initial options in with their values. The Canvas method returns a reference to the newly created Canvas widget.

Copyright © 2002 O'Reilly & Associates. All rights reserved.